for WPF developers
INotifyPropertyChanged
ここでは、MVVM パターンの要となるデータバインディング機能を実現するための INotifyPropertyChanged インターフェースについて紹介します。
MVVM パターンでは、アプリケーション内部構造を下図のように Model、View、ViewModel の 3 つに大別します。
このとき、View と ViewModel でデータを連携する手段としてデータバインディング機能を用います。

MVVM パターンでは、View は ViewModel が公開しているプロパティを参照してそのデータをユーザに見せます。 このとき、ViewModel のプロパティの値が変更したかどうかを知るために用いるのが INotifyPropertyChanged インターフェースです。 逆に View 上でその値が変更されたかどうかを ViewModel が知る必要がありますが、 これは WPF の仕組み上既に備わっている機能で、開発者が明示的に何かをする必要はありません。
INotifyPropertyChanged インターフェースのメンバは次のひとつだけです。
namespace System.ComponentModel
{
    // 概要:
    //     プロパティ値が変更されたことをクライアントに通知します。
    public interface INotifyPropertyChanged
    {
        // 概要:
        //     プロパティ値が変更されたときに発生します。
        event PropertyChangedEventHandler PropertyChanged;
    }
}
それでは、ここで簡単な View をひとつ作成し、 INotifyPropertyChanged インターフェースを備えた ViewModel とデータバインドする例を作成しましょう。 WPF アプリケーション開発のためのプロジェクトはこちらで紹介している方法で作成したプロジェクトを使用します。
まず MainView.xaml を Code 2 のように編集します。
縦にコントロールを並べる StackPanel コントロールの中に、TextBox コントロール、TextBlock コントロール、Button コントロールを
ひとつずつ配置しただけのシンプルな画面です。
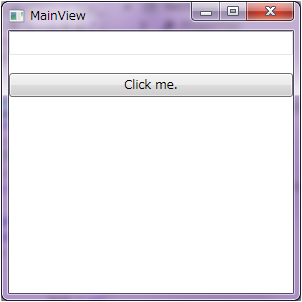
これをコンパイルすると Fig.2 のような画面が表示されます。
<Window x:Class="Section2.Views.MainView"
        xmlns="http://schemas.microsoft.com/winfx/2006/xaml/presentation"
        xmlns:x="http://schemas.microsoft.com/winfx/2006/xaml"
        Title="MainView" Height="300" Width="300">
    <StackPanel>
        <TextBox Text="Hello world." />
        <TextBlock Text="Hello world." />
        <Button Content="Click me." />
    </StackPanel>
</Window>

データバインディング機能を使うために、ViewModel 側に INotifyPropertyChanged インターフェースを実装したプロパティを定義します。 YKToolkit.Controls.dll を利用することで INotifyPropertyChanged インターフェースが既に実装されたクラスを扱うことができますが、 ここでは敢えて INotifyPropertyChanged インターフェースを自前で実装して、その内部構造を知ってもらおうと思います。
INotifyPropertyChanged インターフェースを MainViewModel に実装すると次のようなコードになります。
namespace Section2.ViewModels
{
    using System.ComponentModel;

    public class MainViewModel : INotifyPropertyChanged
    {
        #region INotifyPropertyChanged のメンバ
        /// <summary>
        /// プロパティ変更時に発生します。
        /// </summary>
        public event PropertyChangedEventHandler PropertyChanged;
        #endregion INotifyPropertyChanged のメンバ

        /// <summary>
        /// PropertyChanged イベントを発行します。
        /// </summary>
        /// <param name="propertyName">プロパティ名を指定します。</param>
        protected virtual void RaisePropertyChanged(string propertyName)
        {
            var h = PropertyChanged;
            if (h != null)
                h(this, new PropertyChangedEventArgs(propertyName));
        }
    }
}
INotifyPropertyChanged インターフェースの目的は、View 側に ViewModel のプロパティが変更されたことを通知することです。 したがって、ViewModel 側で公開しているプロパティに変更があったときに、RaisePropertyChanged() メソッドをコールする必要があります。
具体例として、Text プロパティおよび Result プロパティを次のように定義します。
private string text;
/// <summary>
/// 文字列を取得または設定します。
/// </summary>
public string Text
{
    get { return text; }
    set
    {
        if (text != value)
        {
            text = value;
            Result = text.ToUpper();
            RaisePropertyChanged("Text");
        }
    }
}

private string result;
/// <summary>
/// 処理結果を取得または設定します。
/// </summary>
public string Result
{
    get { return result; }
    set
    {
        if (result != value)
        {
            result = value;
            RaisePropertyChanged("Result");
        }
    }
}
ここでは Text プロパティが変更されたとき、すべて大文字にした文字列を Result プロパティに設定するようにしています。
次に、これらのプロパティを参照するように、MainView を次のように変更します。
<Window x:Class="Section2.Views.MainView"
        xmlns="http://schemas.microsoft.com/winfx/2006/xaml/presentation"
        xmlns:x="http://schemas.microsoft.com/winfx/2006/xaml"
        Title="MainView" Height="300" Width="300">
    <StackPanel>
        <TextBox Text="{Binding Text}" />
        <TextBlock Text="{Binding Result}" />
        <Button Content="Click me." />
    </StackPanel>
</Window>
コンパイル、実行すると、
Buton コントロールおよび TextBox コントロールの中身が MainViewModel で定義した Text プロパティの内容と一致するようになるため、起動直後は空白となります。
TextBox コントロール内のテキストを変更した後、TextBox コントロールのキーボードフォーカスを外す(Tab キーを押す)と、TextBlock コントロールのテキストが変化します。
これは、Text プロパティの変更によって Result プロパティが変更され、その変更が TextBlock コントロールの Text プロパティに伝わっているからです。


(a) 起動直後 (b) テキスト変更後
View 側からのプロパティ変更通知のタイミングは設定によって変更できます。
デフォルト値は LostFocus といって、フォーカスを失ったときに通知されるようになっています。
テキスト内容を変更した時点で MainViewModel にその変更が通知されるようにする場合は、PropertyChanged という設定値にする必要があります。
具体的なコードは次のようになります。
<TextBox Text="{Binding Text, UpdateSourceTrigger=PropertyChanged}" />
Designed by CSS.Design Sample